AUCTIONS
DEALERS
WANTED
JOBS
B2B

Our Exclusive Condition Reports Show
Every Detail!
SEE EXAMPLE

ADD
REPORT TO YOUR ITEM
Millions of page views every month!
Over 1800
Transportation Categories.
|
|
      
|
|
| Do you want your Item to catch a little
more attention than the rest? Try Posting an image with your item. Posting an image is a
lot easier than you think. These Step By Step Instructions will help you to do it.
We will also give you some hints on to how to take professional looking pictures of your
item or vehicle. |
If You Want To Do It Yourself
With Your Computer:
| Step 1: You will need one of 2 things.
A digital scanner, or a digital camera. Using this equipment is very simple and gets
easier all the time. If you don't have a scanner, you can pay to get images scanned at
many photocopying stores, Copymax or
Kinko's. Otherwise, if you
plan to scan multiple images, investing in a new scanner might be a good
idea. They are
very inexpensive. When you setup your computer to scan your image, we recommend that
you set your scanner to scan at a resolution of 72 dpi (dots per inch). If the resolution
is too high (over 72 dpi), you run the risk of losing potential bidders because the image
takes too long to download. Even Bidders who are extremely interested in what you may have
to offer will not usually be willing to wait to find out if it is what they thought.
Photos should load quickly or not at all. The internet is a medium in which participants
are accustomed
Once you've scanned your image, be sure to check that it's in a file format that's
universally recognized on the Internet. In simpler terms, check to make sure your image
has a name, followed by a dot, followed by the file type JPEG or GIF.
JPEG Files are
appended to whatever name you choose for your image with a simple "jpg"...Not
"jpeg". For example: car.jpg or myimage.gif |
| Step 2: Uploading Your New Image to the Internet
Now that you have an electronic image in the proper JPG or GIF format, you'll want to find
a place to store it on the Internet. Speak to your internet service provider. Many
times they can be very helpful and assist you in setting up a web page or provide a space
on their servers (equipment) where they can host your photos and even take you throught
the relatively simple process step by step. The goal of uploading your image to the
Internet is to receive a unique URL (Universal Resource Locator) for the image. A URL is
just like a street address. It tells where your image can be found on the Internet
so that it can be linked to your auction, classified or page listing on this site.
. If you prefer not to use your ISP Internet Service Provider, you can use one of
several services available on the Internet to host your images.
Auctionwatch
PixHost
Or you can go create an account at a
Freebased web server and make your own homepage you can place it on.
Tripod
Angelfire
Geocities
Kinkos |
| Step 3: Linking Your Image URL to your Item
Now that your image is uploaded to a server on the internet it has a URL.
Identifying that URL is very simple. View the picture, then look in your browsers toolbar.
It should look something like http://www.mywebserver.com/myaccount/myimage.jpg (as an
example) . The URL is case sensitive and must be an exact match or it wont link correctly.
Place the URL in the Image URL field on the item form. You can use up to 4 images on the
classifieds site as 6 images on the auctions site. |
| If You Would Like Us To Do It For You: There
is no charge if you are listing items on the LIVE AUCTION,
SUPER CLASSIFIEDS, TENDER, BUSINESS TO BUSINESS, FEATURED DEALER or EMPLOYMENT Sites.
Simply Contact us with any questions we can help you
with. Entitle your message "Help With Photos" at:
info@transportuniverse.com
or
Send
us a photo of your item. We will scan it for you and email you the URL you can use in your
item description when you list your item (be sure to include your email address and
Transport Universe USERNAME). If you include the URL of your photo when you first
list your item it will produce a [PIC] icon in all search and listing results.
If you need our assistance to attach a
photo to your listing after it is posted; again, send us the photo of the item this time
we only need your USERNAME and ITEM NUMBER. We will scan the photo and attach it to your
item for you.
|
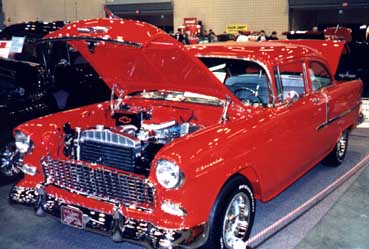
Tips for Taking Better Photos

The key elements of a good
photograph are lighting and composition. Lighting can enhance specific lines you wish to
highlight or it can wash out all definition depending on how skillfully it is
used. The
useful aspect of lighting is that you can see much of what the final result will be right
in the view finder at the time the photograph is taken. You can see the shining white
highlights bouncing off the gleaming wax finish of a car even before you take the photo.
Composition includes making sure you get the whole car in the photo and
don't chop off any necessary bits. Angle photos of cars and equipment are the most
interesting since they provide dimension and and the most visual information available
about the object. Broadside views can be flat or two dimensional unless they are taken
from an offset (say elevated angle) rather than straight on.
For equipment photos, it is important to use a
background of plain white (perhaps a bed sheet for larger items) or gray paper that
has no lines or creases. Use two or three light sources to illuminate the project from all
angles and eliminate shadows rather than using a single, straight-on
flash.
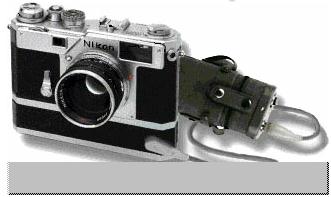
Sharply focus your pictures. If one side of the
vehicle or equipment is fuzzy and out of focus, this will detract from the whole
presentation. Object photos for information purposes should be sharp and fully lit with
good lighting contrast, Anything between five and ten feet from the camera on an
automatic is in focus, you have a fairly narrow depth of field. If anything from five to
50 feet is in focus, you have a much wider depth of field. The smaller the lens opening
(the larger the f-stop number), the greater the depth of field. Most 35-mm SLR camera
lenses have a depth-of-field scale marked on the barrel and perhaps even a depth of field
"preview" button that you can use to judge the amount of available focus. To use
a smaller lens opening (and obtain a greater depth of field) you will have to provide more
light and/or slow the shutter speed.
A lens with a focal length in the range of 70
to 100 mm is generally considered optimum for photographing people and equipment. Such a
lens is called a telephoto lens because it makes the image appear larger and closer
than the "normal" (50-mm) lens of a 35-mm camera. Wide-angle lenses
(shorter than the 50-mm focal length) will make the image appear smaller and farther away.
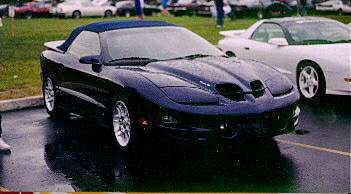
Try to avoid foreshortning this is a photo close to an object making the front of the
object appear much larger and disproportionate to the rest at the far end. Objects should
appear equally proportioned and balanced. Cars with big noses don't come off the
production line that way. People have heads and feet! |
|
|
|
|
Copyright © 1999-2001 Transport Universe Inc. All
Rights Reserved.
Use of this Web site constitutes
acceptance of the TRANSPORT UNIVERSE User Agreement
|
|
